
Floating shelves are a stylish and functional way to enhance any room’s decor while providing storage. With a floating shelves plans PDF, you can create custom designs easily, ensuring a perfect fit for your space and style. These guides offer step-by-step instructions, materials lists, and expert tips to help you build beautiful, sturdy shelves from scratch. Whether you’re a DIY novice or an experienced maker, a PDF plan provides clarity and confidence to bring your project to life.
What Are Floating Shelves?
Floating shelves are wall-mounted structures that appear to float without visible supports, creating a sleek, modern aesthetic. Typically made from wood, they can be customized in size, shape, and finish to match any decor. These shelves are ideal for displaying decorative items, books, or storage needs while maintaining a minimalist look. They are popular in bathrooms, living rooms, and kitchens, offering both functionality and style. Floating shelves can be built using various materials, such as pine, oak, or engineered wood, making them versatile for different design preferences and budgets.

Why Use Floating Shelves Plans PDF?
Floating shelves plans PDFs provide comprehensive guides for building custom shelves. They include detailed instructions, material lists, and diagrams, making it easier for DIY enthusiasts to achieve professional results. These plans save time by offering proven designs that fit various spaces and styles. Whether you’re a novice or experienced maker, a PDF plan ensures accuracy and efficiency. They also allow customization, enabling you to tailor the project to your specific needs and preferences. With a floating shelves plan, you can create beautiful, functional storage solutions that enhance your home’s decor without the hassle of trial and error.
Benefits of DIY Floating Shelves
Building floating shelves yourself offers numerous benefits, including cost savings and customization. DIY projects allow you to choose materials like pine, poplar, or oak, ensuring affordability and a polished finish. Floating shelves provide space-saving storage while enhancing room aesthetics. They are versatile, fitting seamlessly into modern or rustic designs. By following a PDF plan, you can create shelves tailored to your needs, whether for displaying decor or holding essentials. DIY floating shelves also offer a sense of accomplishment and the ability to personalize your home decor without relying on expensive pre-made options.
Materials and Tools Needed
Essential materials include lumber, brackets, screws, and wood glue. Tools like drills, sanders, and measuring tapes are required for precise cuts and assembly. Ensure all items are readily available before starting your project for efficiency and convenience.
Types of Wood for Floating Shelves
Choosing the right wood is crucial for durability and aesthetics. Popular options include pine, oak, and maple, known for their strength and timeless appeal. Cherry and walnut offer a luxurious, modern look, while reclaimed wood adds a rustic charm. Medium-density fiberboard (MDF) is a budget-friendly alternative for smooth finishes. Consider the weight capacity and desired style when selecting wood. Ensure the wood is properly dried and free of knots for a professional finish. Always pre-sand the wood to achieve a smooth surface before staining or painting.
Essential Hardware for Floating Shelves
The hardware you choose is critical for ensuring stability and concealment. Hidden brackets, such as French cleats or floating shelf brackets, are ideal for creating a seamless look. These brackets come in various styles and weight capacities, so select ones that match your shelf’s intended use. Wall anchors, like Molly bolts or toggle bolts, provide extra support for heavier loads. Screws for attaching the brackets to the shelf and wall are also necessary. Ensure all hardware is durable and designed for the weight you plan to hold. This will guarantee a secure and long-lasting installation.
Tools Required for the Project
To build floating shelves, you’ll need a variety of tools to ensure precise cuts and a professional finish. Essential tools include a drill and screwdriver for securing hardware, a tape measure for accurate measurements, and a level to ensure the shelf is straight. Sanding tools, like a sander or sandpaper, will smooth out the wood. A saw or circular saw is necessary for cutting the wood to size. Clamps will help hold the shelf in place while assembling. Additionally, a stud finder is crucial for locating wall studs to anchor the brackets securely. Having the right tools ensures a smooth and successful project.
Planning and Design
Effective planning ensures your floating shelves complement your space. Assess the area, choose a style, and decide on functionality. Create a detailed plan to achieve your vision.
Measuring Your Space

Accurate measurements are crucial for a seamless floating shelf installation. Measure the width and height of your wall space carefully. Consider the length and thickness of the shelf to ensure proper fit. Use a tape measure to determine the distance between wall studs for secure anchoring. Assess the items you plan to display to choose the appropriate shelf size. Ensure symmetry by centering the shelf or aligning it with surrounding decor. Double-check your measurements to avoid cutting errors. Proper planning guarantees a sturdy and visually appealing floating shelf that complements your room’s aesthetics and functionality.
Choosing the Right Design
Selecting the perfect design for your floating shelves involves considering your room’s style and functionality. Modern, rustic, or minimalist designs can enhance your space’s aesthetic. Opt for materials and finishes that match your decor, such as painted wood or natural grains. Assess the intended use—display, storage, or a mix—to determine shelf depth and thickness. Consider the number of shelves needed and their spacing. Customizable designs allow you to tailor length, thickness, and shape to suit your preferences. Ensure the design aligns with your room’s proportions for a balanced look. This step ensures your shelves are both functional and visually appealing.
Customizing Your Shelf Plan
Customizing your shelf plan allows you to tailor every detail to your needs and preferences. Start by adjusting the length, width, and thickness to fit your space and the items you’ll display. Choose from various shapes, such as straight, L-shaped, or rounded edges, to add uniqueness. Incorporate features like drawers, cabinets, or lighting for added functionality. Select finishes and materials that complement your home’s decor, ensuring a seamless integration. Personalize the design further with decorative trim or molding for a polished look. By making these adjustments, you create a one-of-a-kind piece that enhances your room’s functionality and aesthetic appeal.
Step-by-Step Instructions
Follow a detailed guide to build and install floating shelves, from measuring and cutting to assembling and mounting, ensuring a sturdy and visually appealing result.
Preparing the Wall for Installation
Start by locating wall studs using a stud finder to ensure secure anchoring. Clean the wall surface thoroughly and remove any debris. If necessary, fill holes or cracks with spackling compound and sand smooth. Use a level to mark the installation area accurately. For extra support, install wall brackets or anchors, especially for heavy loads. Double-check the wall’s structural integrity to avoid damage. Ensure the wall is dry and free of moisture before proceeding. Proper preparation guarantees a stable and long-lasting floating shelf installation.
Building the Floating Shelf
Cut your wood to the specified measurements using a saw. Sand all edges and surfaces for a smooth finish. Assemble the shelf by drilling pilot holes and securing the boards with wood screws. For added stability, attach hidden support brackets or cleats to the shelf’s underside. Ensure all joints are tight and align properly. Use clamps to hold pieces in place while gluing and screwing. Allow the glue to dry completely before sanding again. Apply a finish, such as paint or stain, if desired, and let it dry before installation. Follow your plan for precise measurements and assembly.
Installing the Floating Shelf
Begin by locating the wall studs using a stud finder. Mark the spot where the shelf will be installed, ensuring it aligns with your earlier measurements. Drill pilot holes into the wall at the marked positions. Insert wall anchors or screws into the holes. Carefully lift the shelf and align the pre-drilled holes on the back with the wall anchors. Screw the shelf securely into place, ensuring it is level. Double-check the alignment and tighten all screws firmly. Test the shelf by gently tugging to ensure stability. Avoid overloading the shelf beyond its weight capacity for safety.

Advanced Techniques
Explore advanced methods like adding lighting, intricate cuts, or decorative trim. Customize designs for unique aesthetics and functionality, ensuring durability and style in every creation.
Building Floating Shelves for Heavy Objects
For shelves designed to hold heavy objects, reinforce the structure with sturdy materials like thick MDF or plywood. Use heavy-duty wall anchors, such as French cleats or molly bolts, to ensure stability. Add internal brackets or supports to distribute weight evenly. Opt for a thicker shelf board and secure it firmly to the wall studs for maximum load capacity. Consider adding a backing panel for extra rigidity. Always consult weight limits and test the shelf with a temporary heavy object before final installation. Ensure the wall is sturdy enough to support the combined weight of the shelf and its contents.
Adding a Finish to Your Floating Shelf
Enhance the appearance and durability of your floating shelf by adding a finish. Start by sanding the wood to ensure a smooth surface. Apply paint, stain, or varnish to match your desired aesthetic. For a natural look, use wood stain and seal with polyurethane. Paint offers a modern, uniform appearance, while varnish protects the wood and accentuates its grain. Allow the finish to dry completely between coats for a professional result. This step not only beautifies the shelf but also protects it from moisture and wear, ensuring longevity and a polished look that complements your home decor.
Creating Custom Shapes and Sizes
Customizing your floating shelf’s shape and size allows for a personalized touch. Use a jigsaw or coping saw to cut unique shapes, such as rounded edges or angular designs. Measure your space carefully to ensure the shelf fits perfectly. For intricate cuts, create a template to guide your saw. Consider using MDF or plywood for easier shaping. Sand all edges smooth for a polished finish. This step allows you to tailor the shelf to your decor, whether modern, rustic, or minimalist. Custom shapes add visual interest, making your floating shelf a one-of-a-kind feature in any room.

Safety Tips and Considerations
Safety is crucial when building floating shelves. Always wear safety glasses and a dust mask. Keep your workspace clean and well-lit to prevent accidents. Use clamps to secure wood during cutting. Never overload shelves beyond recommended weight limits to ensure stability and prevent collapse.
Structural Limits of Floating Shelves

Floating shelves have weight and size limits based on materials and installation methods. Typically, shelves can hold 20-50 pounds per linear foot, depending on hardware and wall type. Exceeding these limits risks collapse. Use wall anchors rated for the expected load and ensure shelves are properly secured. Avoid placing heavy objects near shelf edges to maintain balance. Always test the shelf’s stability before adding items. Overloading can compromise structural integrity, leading to damage or safety hazards. Adhere to the plans’ specifications to ensure optimal performance and longevity of your floating shelves.

Ensuring Stability and Durability
To ensure floating shelves remain stable and durable, proper installation is key. Use high-quality wall anchors suited for your wall type (e.g., drywall, concrete, or wood). Ensure the shelf is level during installation to prevent uneven wear. Select materials like solid wood or MDF for durability. Avoid overloading shelves, and distribute weight evenly. Regularly inspect the hardware and shelf for signs of strain or damage. Applying a protective finish, like varnish or paint, can also extend the shelf’s lifespan. Following the plans’ guidelines ensures long-term stability and prevents structural issues down the line.
Avoiding Common Mistakes
When building floating shelves, common mistakes can compromise the final result. One major error is incorrect measurements, leading to poor fit or uneven alignment. Another is insufficient wall support, causing instability. Using the wrong hardware, such as anchors not suited for your wall type, can result in collapse. Overloading the shelf with excessive weight is also a frequent issue. To avoid these, double-check measurements, use a level, and choose the right materials. Follow the PDF plans carefully, and test the shelf’s weight capacity before use. Proper planning and execution ensure a sturdy, professional-looking floating shelf.
Decorating and Styling
Floating shelves add a sleek, modern touch to any room. Use them to display decorative items, books, or plants. Combine with lighting for ambiance.
Choose finishes that match your home’s aesthetic for a cohesive look. Experiment with textures and colors to enhance visual appeal. Personalize your space with unique arrangements that reflect your style. Floating shelves are versatile and can elevate any room’s decor effortlessly, blending functionality with elegance. They are perfect for creating a minimalist or rustic vibe, depending on your design preferences. Styling options are endless, making them a great addition to any home.
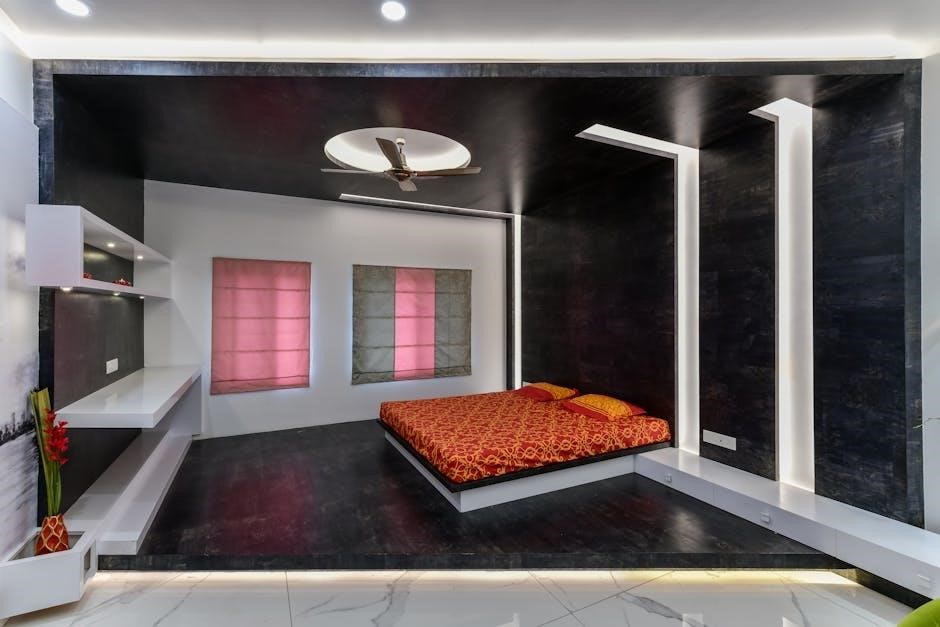
Using Floating Shelves in Different Rooms
Floating shelves are incredibly versatile and can enhance any room in your home. In the living room, they can display decorative items or media devices. Kitchens benefit from additional storage for dishes or spices, while bathrooms can use them for toiletries. Bedrooms and offices can incorporate floating shelves for books, photos, or organizational needs. Their adaptability makes them a practical and stylish solution for every space. By installing floating shelves, you can create a cohesive look across your home while addressing specific storage needs in each area.
Styling Tips for Modern and Rustic Looks
Floating shelves can seamlessly fit into both modern and rustic interiors. For a modern look, opt for sleek materials like glass or metal, paired with minimalist designs. Neutral colors and clean lines create a sophisticated aesthetic. In contrast, a rustic style embraces natural wood finishes and distressed textures for a cozy, vintage vibe. Add decorative brackets or carvings for extra charm. Mix materials like reclaimed wood with industrial elements for a unique blend. Regardless of the style, floating shelves offer timeless appeal and versatility, making them a perfect addition to any room’s decor.
Combining Floating Shelves with Other Decor
Floating shelves can be beautifully integrated with other decor elements to create a cohesive space. Pair them with pendant lights or sconces for a modern ambiance, or add woven baskets and greenery for a rustic touch. Mixing textures like wood, metal, and glass enhances visual interest. Consider layering shelves with framed artwork, vintage items, or decorative objects to add depth. For a harmonious look, align the shelf style with your room’s existing furniture and color scheme. This blend of functionality and aesthetics ensures floating shelves complement your overall decor while serving as a practical storage solution.
Floating shelves plans PDF offer a comprehensive guide to creating functional and stylish storage solutions. With detailed instructions and creative ideas, you can transform any space effortlessly.
Final Thoughts on Floating Shelves Plans PDF
Floating shelves plans PDF provide a wealth of knowledge to craft sleek, functional storage solutions. These guides cater to all skill levels, offering versatility and customization. Whether modern or rustic, the plans ensure durability and style. With step-by-step instructions, you can achieve professional results. The ability to adapt designs to your space and preferences makes these plans invaluable. They empower you to create beautiful, functional pieces that enhance your home decor. Start your project with confidence, knowing you have the tools and guidance to succeed. Floating shelves plans PDF unlock creativity and simplify DIY projects, ensuring lasting satisfaction.
Encouragement to Start Your Project
Embarking on a floating shelves project is an exciting way to enhance your space and showcase your creativity; With a floating shelves plans PDF, you have a clear roadmap to success. Whether you’re a seasoned DIYer or a beginner, these guides offer the confidence to create something beautiful and functional. Start small, learn as you go, and enjoy the satisfaction of crafting something with your own hands. The comprehensive instructions and customizable designs make it easy to bring your vision to life. Don’t hesitate—gather your materials, follow the plans, and transform your space with stunning floating shelves!

Additional Resources

Explore online communities, YouTube tutorials, and Pinterest for inspiration. Check out books and guides for advanced techniques and unique designs to enhance your project.
Recommended Websites for Floating Shelf Plans
Discover detailed floating shelf plans on popular DIY websites like Ana White and The Spruce. These sites offer free and premium plans, catering to various skill levels and designs. Instructables provides step-by-step tutorials with images, while MyOutdoorPlans specializes in outdoor and rustic shelf ideas. Many platforms also include video guides and material lists, ensuring a smooth project execution. These resources are perfect for both beginners and experienced DIY enthusiasts seeking inspiration or specific instructions.
YouTube Tutorials for Visual Guidance
YouTube offers an abundance of tutorials that provide visual guidance for building floating shelves. Channels like The King of Random and Home Repair Tutor share detailed videos. These tutorials are ideal for visual learners, showcasing each step of the process. Whether you’re a beginner or an experienced DIYer, you’ll find tutorials tailored to your skill level. Additionally, many creators offer tips and tricks to enhance your project. Pairing these videos with your floating shelves plans PDF ensures a comprehensive understanding and successful execution of your project.
Books and Guides on Floating Shelves
For a more in-depth understanding, consider books and guides dedicated to floating shelves. Titles like The Complete Book of Woodworking and DIY Shelving offer detailed plans and techniques. These resources often include step-by-step instructions, material lists, and design inspiration. They cater to both beginners and experienced craftsmen, providing tips on styling and functionality. Many books focus on modern and rustic designs, helping you match your shelves to your home decor. Pairing these guides with your floating shelves plans PDF ensures a well-rounded approach to your project, covering both practical and creative aspects.