Manual Photography Cheat Sheet: A Comprehensive Guide
Dive into mastering your camera! This guide unlocks the secrets of manual photography‚ covering exposure‚ aperture‚ shutter speed‚ and ISO for stunning results.
Understanding Exposure: The Foundation
Exposure is the cornerstone of photography‚ dictating the brightness and detail captured in your images. It’s fundamentally about controlling the amount of light reaching your camera’s sensor (or film!). Achieving proper exposure isn’t simply about making things “bright enough”; it’s about balancing light to create a visually appealing image with accurate tones and details.
Understanding exposure requires grasping how aperture‚ shutter speed‚ and ISO interact – the “exposure triangle”. Incorrect exposure leads to underexposed (too dark) or overexposed (too bright) photos‚ losing crucial information. Mastering this foundation unlocks creative control.
The Exposure Triangle: Aperture‚ Shutter Speed‚ and ISO
The exposure triangle represents the three key settings that control light in photography: aperture‚ shutter speed‚ and ISO. These elements aren’t independent; changing one impacts the others. Aperture controls the lens opening‚ influencing depth of field. Shutter speed dictates how long the sensor is exposed to light‚ affecting motion blur.
ISO measures the sensor’s sensitivity to light. Higher ISOs are useful in low light but introduce noise. Balancing these three settings is crucial for achieving a well-exposed and creatively compelling photograph.
Aperture: Controlling Depth of Field
Aperture‚ measured in f-stops (e.g.‚ f/2.8‚ f/8‚ f/16)‚ controls the size of the lens opening. A wider aperture (lower f-number) lets in more light and creates a shallow depth of field – blurring the background. Conversely‚ a narrower aperture (higher f-number) reduces light intake and increases depth of field‚ keeping more of the scene sharp.
Mastering aperture allows you to isolate subjects or capture expansive landscapes with everything in focus. It’s a fundamental tool for creative control in your photography.
What is Aperture? (f-stop)
Aperture refers to the opening within your lens that allows light to pass through to the camera sensor. It’s measured in f-stops – a series of numbers like f/1.4‚ f/2‚ f/2.8‚ f/4‚ and so on.
Crucially‚ these numbers are fractions. A lower f-stop (like f/1.4) means a wider opening‚ letting in more light. A higher f-stop (like f/16) signifies a smaller opening‚ restricting light. Understanding f-stops is key to controlling exposure and depth of field.
Aperture and Depth of Field Relationship
Aperture directly impacts depth of field (DoF) – the area in your image that appears sharp. A wide aperture (low f-stop‚ like f/1.8) creates a shallow DoF‚ blurring the background and isolating your subject. This is ideal for portraits.
Conversely‚ a narrow aperture (high f-stop‚ like f/16) yields a large DoF‚ keeping more of the scene in focus. This is perfect for landscapes. Mastering this relationship allows creative control over your images‚ guiding the viewer’s eye.
Shutter Speed: Capturing Motion
Shutter speed dictates how long the camera’s sensor is exposed to light. Measured in seconds or fractions of a second‚ it dramatically affects motion portrayal. Fast shutter speeds (e.g.‚ 1/1000s) freeze action‚ ideal for sports or wildlife photography.
Slow shutter speeds (e.g.‚ 1 second or longer) blur motion‚ creating a sense of movement – perfect for capturing light trails or silky water effects. A tripod is crucial for slow speeds to avoid camera shake.
What is Shutter Speed?
Shutter speed represents the duration the camera sensor is exposed to light. It’s a fundamental element of photography‚ measured in seconds or fractions thereof – like 1/200th of a second‚ or a full second. Think of it as a curtain opening and closing in front of the sensor.
A faster shutter speed means a shorter exposure‚ while a slower shutter speed means a longer one. This directly impacts how motion is captured in your images‚ influencing sharpness and blur.
Shutter Speed and Motion Blur/Freezing Action
Shutter speed dramatically affects motion depiction. Fast shutter speeds – like 1/500th of a second or faster – effectively “freeze” action‚ ideal for sports or wildlife photography. Conversely‚ slower shutter speeds – 1/30th of a second or longer – create motion blur‚ conveying a sense of movement.
Experimentation is key! A slightly slower speed can blur a waterfall beautifully‚ while a rapid speed captures a bird in mid-flight with crystal clarity. Consider your subject and desired effect.
ISO: Sensitivity to Light
ISO determines your camera sensor’s sensitivity to light. Lower ISO values (like 100) mean less sensitivity‚ requiring more light for a proper exposure‚ resulting in cleaner images. Higher ISO values (like 3200 or higher) increase sensitivity‚ allowing shooting in darker conditions‚ but introduce digital noise.
Balance is crucial. Start with the lowest possible ISO and increase it only when necessary to achieve a correct exposure without sacrificing image quality. Understanding this trade-off is vital.
What is ISO?
ISO‚ originally from film photography‚ measures the sensitivity of your camera’s image sensor to light. A lower ISO number‚ such as 100‚ indicates low sensitivity and requires more light. Conversely‚ a higher ISO‚ like 3200‚ signifies greater sensitivity‚ enabling shooting in dimly lit environments.
Think of it as amplification. Increasing ISO boosts the signal from the sensor‚ but also amplifies noise. It’s a key element in the exposure triangle‚ impacting brightness and image quality.
ISO and Image Noise
Increasing ISO introduces image noise – those grainy‚ speckled imperfections that detract from image clarity. While higher ISOs allow shooting in low light‚ they come at the cost of image quality. The higher the ISO‚ the more noticeable the noise becomes‚ impacting detail and color accuracy.
Modern cameras handle high ISOs better‚ but finding the sweet spot – the highest usable ISO before noise overwhelms the image – is crucial. Careful consideration of ISO is vital for clean‚ professional-looking photographs.
Metering Modes: How Your Camera Sees Light
Your camera’s metering mode dictates how it analyzes a scene’s light to determine the correct exposure. Understanding these modes is vital for accurate results. Evaluative/Matrix Metering assesses the entire scene‚ ideal for general use. Center-Weighted Metering prioritizes the center of the frame‚ useful for portraits.
Spot Metering measures light from a very small area‚ perfect for challenging lighting situations. Choosing the right mode ensures your camera ‘sees’ the light as you intend‚ leading to properly exposed images.
Evaluative/Matrix Metering
Evaluative (Canon) or Matrix (Nikon) metering is your camera’s default‚ all-purpose mode. It analyzes the entire scene‚ dividing it into segments and assessing light levels across each. This mode cleverly considers brightness and contrast distribution‚ aiming for a balanced exposure.
It’s fantastic for everyday photography‚ offering reliable results in most situations. However‚ it can be fooled by strong backlighting or scenes with significant contrast. It’s a great starting point for beginners‚ providing consistent and generally accurate exposures.
Center-Weighted Metering
Center-weighted metering prioritizes the light readings from the center of the frame‚ diminishing sensitivity as you move towards the edges. This mode assumes your primary subject is usually located centrally‚ striving for accurate exposure there.
It’s beneficial when your subject is clearly in the middle‚ and you want to ensure it’s properly exposed‚ even if the surroundings are brighter or darker. However‚ it can be misled if the subject isn’t centered or if strong light sources are near the frame’s periphery.
Spot Metering
Spot metering is the most precise metering mode‚ evaluating light from a very small‚ central area – typically around 2-5% of the frame. This allows for highly accurate exposure readings of a specific point‚ ignoring the rest of the scene.
It’s ideal for challenging lighting situations‚ like backlit subjects or scenes with high contrast. However‚ it demands careful aiming; misplacing the spot can lead to significant under or overexposure. Mastering spot metering requires practice and understanding of your camera’s capabilities.
Exposure Compensation: Fine-Tuning Your Exposure
Exposure compensation overrides the camera’s automatic metering system‚ allowing you to brighten or darken the image. Measured in stops (+/- EV)‚ it’s crucial when your camera is fooled by bright or dark scenes.
For example‚ a snowy landscape might be underexposed‚ requiring +1 or +2 EV. Conversely‚ a dark subject against a bright background may need -1 or -2 EV. Use it to achieve the desired brightness and maintain detail in highlights and shadows‚ refining the automatic reading.
Histograms: Reading Your Exposure
Histograms are graphical representations of tonal distribution in your image‚ showing pixels from dark to bright. They’re vital for assessing exposure accuracy beyond what your camera’s LCD displays. A histogram skewed to the left indicates underexposure‚ losing shadow detail.
Conversely‚ a right-skewed histogram suggests overexposure‚ blowing out highlights. An ideal histogram generally spans the entire range‚ indicating a balanced exposure. Learn to interpret these graphs to avoid clipping and achieve optimal tonal range.
Understanding Histogram Graphs
A histogram’s horizontal axis represents tonal values‚ ranging from black (left) to white (right). The vertical axis shows the frequency of each tone – how many pixels share that brightness level. Peaks indicate dominant tones; a large peak at the left means many dark pixels.
Gaps signify a lack of tones‚ while a histogram crammed to one side suggests lost detail. Analyzing the shape reveals exposure issues‚ guiding adjustments for balanced‚ detailed images. Mastering this visual tool is crucial.
Using Histograms to Avoid Over/Under Exposure
To avoid overexposure‚ ensure the histogram doesn’t “clip” on the right side – meaning no pixels reach maximum brightness. Under-exposure is indicated by clipping on the left‚ signifying lost shadow detail. A well-exposed image generally shows a distribution across the graph‚ avoiding extreme bunching.
Adjust aperture‚ shutter speed‚ or ISO to shift the histogram. Prioritize preserving highlight detail‚ as recovering blown-out highlights is often impossible. Use the histogram as a real-time feedback tool for optimal exposure.
White Balance: Achieving Accurate Colors
White balance (WB) ensures colors appear natural‚ correcting for different light sources. Auto White Balance (AWB) attempts to guess the correct setting‚ often succeeding in good conditions‚ but can falter with mixed or unusual lighting.
Preset options like Daylight‚ Cloudy‚ or Tungsten offer more control. Custom WB allows you to manually set the balance using a white or gray card for ultimate accuracy. Incorrect WB results in color casts – warm (yellow/orange) or cool (blue).
Auto White Balance (AWB)
Auto White Balance (AWB) is your camera’s attempt to intelligently determine the correct color temperature in a scene. It analyzes the light and adjusts the color balance to render whites as‚ well‚ white! While convenient‚ AWB isn’t foolproof. It excels in consistent lighting but struggles with mixed sources.
Expect potential inaccuracies under fluorescent lights or when transitioning between sunlight and shade. AWB is a good starting point‚ but for critical color accuracy‚ exploring preset or custom white balance settings is recommended.
Preset White Balance Options
Preset White Balance options offer more control than AWB‚ catering to common lighting scenarios. These include Daylight‚ Cloudy‚ Shade‚ Tungsten (incandescent)‚ and Fluorescent. Selecting the appropriate preset tells your camera the dominant light source‚ improving color accuracy.
Daylight is ideal for sunny conditions‚ while Cloudy adds warmth. Shade compensates for cooler tones. Tungsten corrects the orange cast of indoor lights‚ and Fluorescent tackles the green tint. Experimenting with presets is key to achieving natural-looking colors in various situations.
Focusing Techniques: Sharpness is Key
Achieving sharp images relies on mastering focusing techniques. Manual Focus grants complete control‚ ideal for precise adjustments or low-light situations where autofocus struggles. Autofocus offers speed and convenience‚ perfect for dynamic subjects.
Within autofocus‚ Single-Area AF focuses on a specific point‚ while Continuous AF tracks moving subjects. Understanding these modes is crucial. Back-button focus separates focusing from the shutter release‚ enhancing control. Practice both methods to determine what suits your shooting style best.
Manual Focus vs. Autofocus
Manual focus demands direct control‚ rotating the focusing ring on your lens to achieve sharpness. It excels in challenging conditions where autofocus falters – low light‚ or subjects obscured by obstacles. Autofocus‚ conversely‚ utilizes the camera’s system to automatically find and lock focus‚ prioritizing speed and convenience.
While autofocus is faster‚ manual focus offers precision. Learning to switch between both is vital. Consider manual focus for landscapes or static subjects‚ and autofocus for action or portraits. Mastering both expands your photographic capabilities significantly.
Focusing Modes (Single‚ Continuous)
Single-Area AF (One-Shot) is ideal for stationary subjects. The camera locks focus when you half-press the shutter‚ perfect for portraits or landscapes. Continuous AF (AI Servo) tracks moving subjects‚ constantly adjusting focus as they change position – essential for sports or wildlife photography.
Understanding these modes is crucial. Single AF prioritizes accuracy‚ while Continuous AF prioritizes tracking. Many cameras also offer AF-C with subject detection‚ enhancing tracking capabilities. Experiment to determine which mode best suits your shooting scenario.
Composition Rules: Creating Visually Appealing Images
Composition transforms a snapshot into art. The Rule of Thirds divides your frame into nine equal parts‚ placing key elements along these lines or intersections for balance. Leading Lines draw the viewer’s eye into the scene‚ creating depth and interest.
Consider symmetry‚ patterns‚ and negative space. Experiment with different angles and viewpoints. Don’t be afraid to break the rules once you understand them! Strong composition elevates your images‚ guiding the viewer’s attention and enhancing storytelling.
Rule of Thirds
The Rule of Thirds is a foundational composition guideline. Imagine dividing your image into nine equal parts using two horizontal and two vertical lines. Key elements should be placed along these lines or at their intersections – these are often called “power points”.
This avoids centering subjects‚ creating more dynamic and visually interesting photos. It encourages a balanced composition‚ drawing the viewer’s eye around the frame. Experiment with off-center placement for a more compelling image!
Leading Lines
Leading lines are visual elements that draw the viewer’s eye into an image‚ often towards a specific point of interest. These can be roads‚ fences‚ rivers‚ or even patterns created by shadows and light.
Effectively utilizing leading lines adds depth and perspective to your photographs. They create a sense of movement and guide the viewer’s journey through the scene. Experiment with different angles and perspectives to maximize their impact and create a more engaging composition.
Long Exposure Photography: Capturing Time
Long exposure photography transforms ordinary scenes into ethereal works of art. By using a slow shutter speed – often several seconds or even minutes – you capture motion blur‚ creating dreamy effects with water‚ clouds‚ and light trails.
A tripod is essential for stability during these extended exposures. Neutral Density (ND) filters reduce the amount of light entering the lens‚ allowing for longer exposures even in bright conditions. Experiment with different shutter speeds to achieve varied levels of motion blur and capture the passage of time.
Using Neutral Density (ND) Filters
Neutral Density (ND) filters are crucial for long exposure photography in bright light. They reduce the intensity of all wavelengths of light equally‚ without affecting color. This allows you to use slower shutter speeds‚ even on sunny days‚ to create motion blur effects – think silky smooth waterfalls or blurred clouds.
ND filters are measured in stops; a 3-stop ND filter reduces light by a factor of eight. Experiment with different strengths to achieve the desired exposure. Remember to focus before attaching the filter‚ as it can make viewing the scene more difficult.
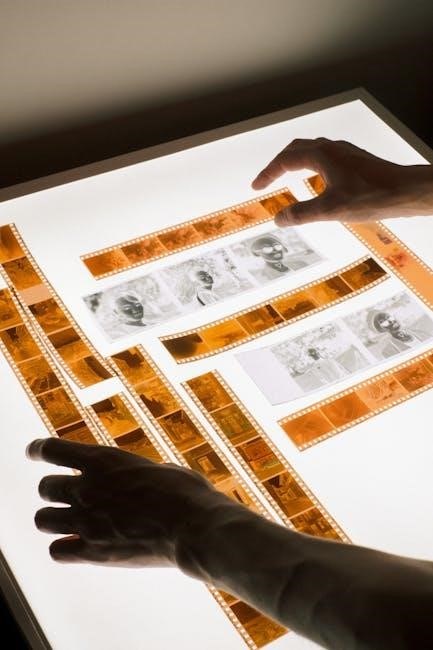
Tripod Stability for Long Exposures
A sturdy tripod is non-negotiable for long exposure photography. Even the slightest movement during a lengthy shutter release will result in a blurry image. Invest in a robust tripod capable of supporting your camera and lens weight.
Extend tripod legs carefully‚ ensuring each section is locked securely. Utilize the center column cautiously‚ as it can compromise stability. Consider adding weight to the tripod’s hook for increased steadiness‚ especially in windy conditions. Remote shutter release or self-timer minimizes camera shake.
Understanding Exposure Value (EV)
Exposure Value (EV) simplifies exposure settings by combining aperture and shutter speed into a single number. A lower EV indicates underexposure‚ requiring more light‚ while a higher EV suggests overexposure‚ needing less.
EV scales help correlate settings; for example‚ f/2.8 at 1/125s has the same EV as f/4 at 1/60s. Using EV allows for quicker adjustments and consistent exposures across different lighting scenarios. Mastering EV streamlines your workflow and enhances photographic control.
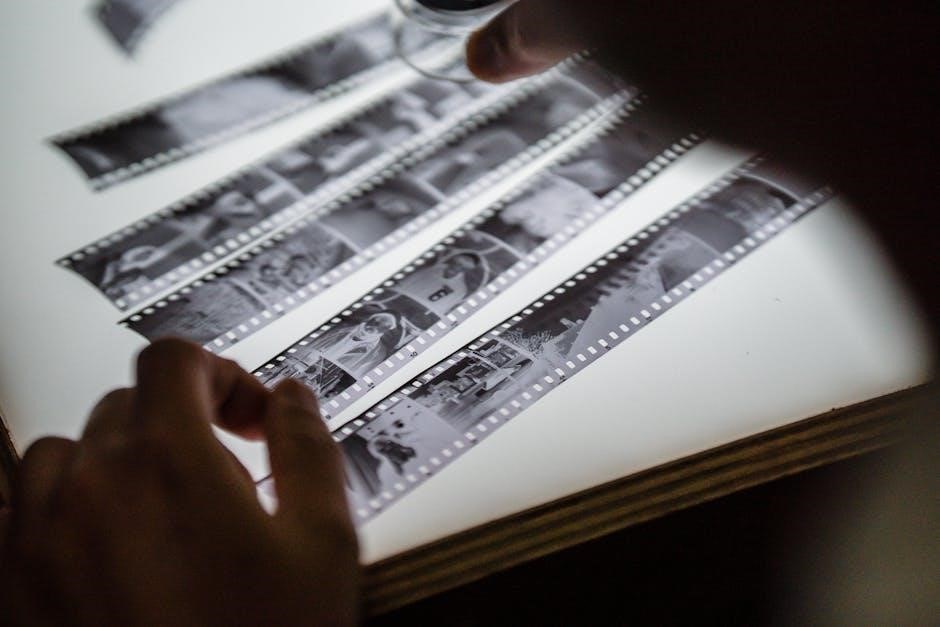
Film Speed and its Equivalents
Film speed‚ denoted by ISO (or ASA)‚ measures a film’s sensitivity to light. Lower ISOs (e.g.‚ 50‚ 100) are less sensitive‚ ideal for bright conditions‚ producing finer grain. Higher ISOs (e.g.‚ 400‚ 800‚ 1600) excel in low light but introduce more noticeable grain.
Understanding equivalents is crucial. A digital ISO setting roughly corresponds to its film counterpart. Choosing the right speed balances image quality and the ability to capture images in varying light levels‚ impacting the final aesthetic.
Reciprocity Failure in Film Photography
Reciprocity failure occurs when extremely long or short exposure times deviate from the expected linear relationship between exposure duration and film density. Essentially‚ the film’s response to light becomes less predictable outside of its “normal” exposure range.
Long exposures often require increased exposure compensation – adding extra time – because the film doesn’t continue to respond linearly. Conversely‚ very short exposures may also need adjustment. Understanding this phenomenon is vital for accurate exposure in challenging lighting scenarios.
Common Film Stocks and Their Characteristics
Kodak Portra 400 is renowned for its beautiful skin tones and versatility in various lighting conditions‚ making it a portrait staple. Fujifilm Pro 400H offers a pastel aesthetic and excellent color rendition‚ favored for fashion and landscapes.
Ilford HP5 Plus‚ a classic black and white film‚ excels in contrast and grain structure. Kodak Tri-X 400 provides a punchy look with pronounced grain. Choosing the right film stock dramatically impacts the final image’s mood and style.
Troubleshooting Exposure Problems
Underexposed photos? Increase aperture (lower f-stop)‚ slow shutter speed‚ or raise ISO. Overexposed images? Decrease aperture (higher f-stop)‚ speed up shutter speed‚ or lower ISO.
Check your metering mode – evaluative can be fooled by strong backlighting. Utilize the histogram to visually assess exposure accuracy. Ensure correct film speed is set on your camera. Regularly test your light meter’s accuracy for consistent results. Practice makes perfect!
